Hogar Aplicaciones Vida de moda BeePass VPN: Easy & Secure
BeePass VPN: Easy & Secure

BeePass VPN: Easy & Secure

Vida de moda
  • Plataforma:Android
  • Versión:v1.7.0
  • Tamaño:11.20M
  • Desarrollador:BeePass VPN Team
4.5
Descripción

BeePass VPN: Easy & Secure es una aplicación VPN gratuita y de código abierto que prioriza la privacidad del usuario. Los usuarios pueden acceder de forma segura a Internet con ancho de banda ilimitado, beneficiándose de un cifrado sólido y una experiencia sin publicidad. Simplifica la configuración de VPN para una navegación fluida y garantiza la privacidad digital con un desarrollo transparente impulsado por la comunidad.

BeePass VPN: Easy & Secure
Potenciar el acceso seguro a Internet: BeePass VPN: Easy & Secure

Durante la última década, hemos colaborado con tecnólogos, académicos e investigadores líderes para promover la seguridad en Internet. Ahora, aportamos esta experiencia a BeePass VPN: Easy & Secure, garantizando que puedas acceder de forma segura a tus sitios web y aplicaciones favoritos en cualquier momento y lugar.

Aspectos destacados de BeePass VPN: Easy & Secure

  • Seguro y confiable: BeePass VPN: Easy & Secure garantiza sólidas medidas de seguridad, protegiendo sus actividades en Internet con sólidos protocolos de cifrado. Garantiza una experiencia de navegación segura en varias redes.
  • Enfoque único: Distinguiéndose, BeePass VPN: Easy & Secure adopta una estrategia innovadora en el panorama de las VPN. Integra funciones fáciles de usar con un enfoque en mejorar la privacidad digital sin comprometer la usabilidad.
  • Gratis: BeePass VPN: Easy & Secure es completamente gratuito y está respaldado por asociaciones y financiación pública. Los usuarios pueden disfrutar de acceso ilimitado a sus servicios sin anuncios intrusivos, lo que garantiza una experiencia de navegación perfecta.

BeePass VPN: Easy & Secure
Acceso ilimitado

Disfruta de acceso a Internet sin restricciones con BeePass VPN: Easy & Secure. Ya sea transmitiendo, navegando o accediendo a contenido globalmente, no hay límites de ancho de banda ni de uso.

Fundación de código abierto

Construido sobre un marco de código abierto, BeePass VPN: Easy & Secure promueve la transparencia y el desarrollo impulsado por la comunidad. Aprovecha los comentarios y contribuciones de la comunidad para mejorar continuamente sus funciones y seguridad.

Soporte centrado en el usuario

BeePass VPN: Easy & Secure está diseñado para simplificar la experiencia de VPN. Proporciona herramientas intuitivas para ayudar a los usuarios a configurar y administrar sus conexiones privadas de forma segura, garantizando la facilidad de uso para todos.

¿Por qué elegir BeePass VPN: Easy & Secure?

  • Acceso gratuito, sin anuncios: A diferencia de los modelos tradicionales, BeePass VPN: Easy & Secure no tiene publicidad. A través de asociaciones con proveedores de contenido y financiación pública, lo mantenemos completamente gratuito para los usuarios.
  • Construido sobre la base de la confianza: BeePass VPN: Easy & Secure se distingue por su enfoque de código abierto y utiliza el sólido protocolo ShadowSocks. , inspirado en el esquema de Google Jigsaw. Nuestro compromiso de una década con soluciones impulsadas por la comunidad garantiza una innovación continua en accesibilidad a Internet.
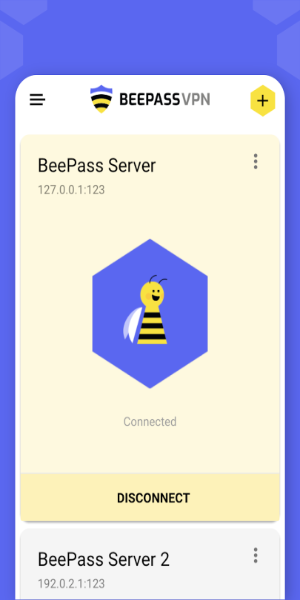
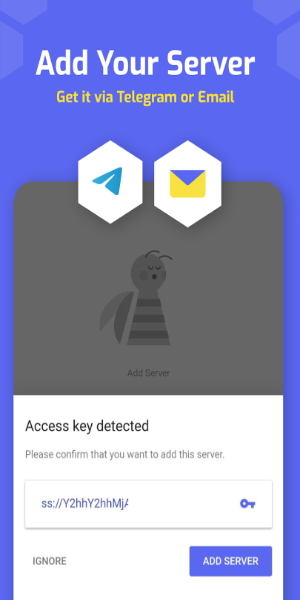
  • Enfoque de servidor centrado en el usuario: Brindamos a los usuarios un proceso de configuración de servidor seguro y fluido, mejorando el control y privacidad sin comprometer la comodidad.

BeePass VPN: Easy & Secure

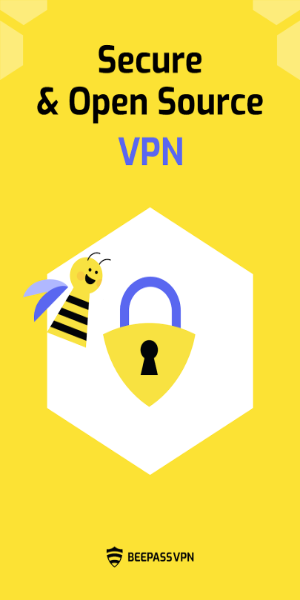
  • Privacidad mejorada: BeePass VPN: Easy & Secure prioriza la privacidad con enmascaramiento de IP y cifrado del tráfico de Internet, adhiriéndose a estrictos principios de minimización de datos descritos en nuestra Política de privacidad.
  • La seguridad es lo primero: Desarrollado con software de código abierto rigurosamente auditado y que emplea un cifrado sólido, protege sus actividades en línea con estándares de seguridad inflexibles.
  • Tenga en cuenta: Si bien BeePass VPN: Easy & Secure mejora la privacidad, no proporciona anonimato en línea. Para herramientas de anonimato, explore el Proyecto Tor.

Descarga gratuita BeePass VPN: Easy & Secure APK

Descubra BeePass VPN: Easy & Secure hoy y tome el control de su privacidad en línea sin esfuerzo. Con acceso ilimitado, seguridad sólida y compromiso con la transparencia, le garantiza navegar por la web de forma segura y libre. Descárguelo ahora y experimente la diferencia en la navegación segura por Internet.

Etiquetas : Estilo de vida

BeePass VPN: Easy & Secure capturas de pantalla
  • BeePass VPN: Easy & Secure Captura de pantalla 0
  • BeePass VPN: Easy & Secure Captura de pantalla 1
  • BeePass VPN: Easy & Secure Captura de pantalla 2
Techie Feb 05,2025

Simple to use and very secure. I appreciate the open-source nature of this VPN. A solid choice for privacy-conscious users.

SicheresInternet Jul 19,2024

Ein einfaches und effektives VPN. Bietet sicheres und privates Surfen.

Privacidad May 28,2024

VPN sencillo y fácil de usar. Cumple su función, aunque la velocidad podría ser mejor.

安全爱好者 May 19,2024

这款VPN易于使用且安全可靠,开源特性也值得称赞。推荐给注重隐私的用户。

SeguridadOnline May 18,2024

Una VPN sencilla y eficaz. Funciona bien, pero a veces es un poco lenta.

网络安全 Jan 07,2024

这个VPN用起来还行,就是有时候连接不上,速度也不太稳定。

PrivacyAdvocate Nov 16,2023

Simple and effective VPN. Provides a secure and private browsing experience.

Sicherheitsfreak Sep 13,2022

Die App ist in Ordnung, aber die Geschwindigkeit ist manchmal etwas langsam. Die Einrichtung ist einfach.

AnonymeSurLeNet Aug 04,2022

Une excellente VPN, simple d'utilisation et très sécurisée. Je la recommande vivement!

UtilisateurVPN May 23,2022

Excellent VPN, gratuit et open-source. Je le recommande vivement pour sa simplicité et sa sécurité.

Últimos artículos
CD > ER > ATK% > Speed (only if needed for turn order) ❌ Avoid: HP%, DEF%, Healing Bonus (unless for a niche support role) 2. Artifact Sets (Recommended) ✅ Best Set (High Burst DPS) 2pc: "The Wasted Heir" (Quantum) 4pc: "The Wasted Heir" (Quantum) Effect: After using an Elemental Burst, gain 30% ATK% and 30% SPD for 1 turn. This stacks up to 2 times. 💡 Why it’s great: Massive burst boost, perfect for a Quantum DPS. The 30% ATK% and SPD boost dramatically increases damage on burst turn. ⚠️ Note: Requires 2-stack management (use burst, then use another ability to refresh the buff). You’ll want to use burst, then normal attack to maintain uptime. 🔁 Alternative (if "The Wasted Heir" not available) 2pc: "Searing Moon" (Quantum) 2pc: "Stalwart and Sojourner" (Quantum) 4pc: "Searing Moon" (Quantum) Effect: After breaking an enemy, gains 20% ATK% and 20% EM (Energy Multiplier) for 2 turns. 💡 Best for: Enemies with high defense or shields, especially in Abyss floors or hard mode. 🔥 High-Efficiency Set (if you need more CDR/ER) 4pc: "The Wasted Heir" (Quantum) 4pc: "The Wasted Heir" (Quantum) + 2pc: "Searing Moon" (if you're struggling with CDR/ER) ✅ Use 2pc: "The Wasted Heir" + 2pc: "Searing Moon" only if you're maxing CDR and want extra EM for Weakness Break. 🛡️ Auras (Emblems) – Aura Selection Note: Auras (Emblems) are passive traits that enhance stats based on character level, rank, and talent level. ✅ Best Aura (Maximize Burst Damage) Emblem: "The Wasted Heir" (Quantum) Effect: After using an Elemental Burst, gain +30% ATK% and +30% SPD for 1 turn. Why: Directly increases damage output on burst turn. ✅ Best for: Single-target burst, boss fights, and hard-mode Abyss. 🔁 Alternative Auras Emblem: "The Wasted Heir" (Quantum) + 2pc: "Searing Moon" (if you want EM boost on Break) Emblem: "Searing Moon" (Quantum) Effect: After breaking an enemy, gain +20% ATK% and +20% EM for 2 turns. ⚠️ Use this only if you're fighting enemies with high defense or shields. 🧩 Talent Priorities Ultimate (Burst): Max as #1 priority (most damage output). Normal Attack: Max to maintain energy and for sub-ability usage. Skill: Max only if it provides useful utility (e.g., energy regeneration, shield, or status effect). Evasion/Defensive Skills: Usually not prioritized unless you’re in a very hard mode or need survivability. ✅ Golden Rule: Burst > Normal Attack > Skill 🎮 Team Synergy Tips Support Pairing: Use a Quantum Break DPS (e.g., Acheron, Yanqing) to trigger Weakness Breaks. Pair with a Debuff/DoT support (e.g., Herta, Pela, Fu Hua) to extend burst uptime. Include a CDR or ER support (e.g., Machina, Setaria) to enable faster bursts. Energy Management: Use characters like Sampo (if available) or Luka to regenerate energy fast. Perfect Turn Order: Place Heirs after your energy regenerator or support, so they can burst immediately. 📊 Final Build Summary Stat Target Notes Main Stat ATK% (if using 4pc The Wasted Heir) Otherwise CR or CD Sub-Stats CR > CD > ER > ATK% > SPD Prioritize CR/CD balance Artifacts 4pc "The Wasted Heir" (Quantum) Best for burst damage Emblems "The Wasted Heir" (Quantum) Boosts burst damage Talents Ultimate > Normal Attack > Skill Max Ultimate first 🏁 Final Thoughts Abyss's Chosen Heirs shines in high-damage burst fights, especially against bosses, elite enemies, and Abyss floors. "The Wasted Heir" set + 4pc emblem is unmatched for Quantum DPS in 5-star tier. Prioritize CR/CD balance, ER for energy sustainability, and team synergy. ✨ Pro Tip: Use "Quantum" or "Break" decks to maximize Weakness Break and burst damage synergy. If you have a specific version of Abyss's Chosen Heirs (e.g., Acheron, Yanqing, or another name), let me know and I’ll tailor the guide exactly to that character. Stay strong, Trailblazer. The Abyss awaits. 🌑⚔️" > Certainly! Here's a comprehensive Stat and Aura Guide for Abyss's Chosen Heirs in Honkai: Star Rail, focusing on optimal builds, stat priorities, and aura (Emblem) selection to maximize damage, survivability, and team synergy.

🌑 Abyss's Chosen Heirs – Overview

Character: Abyss's Chosen Heirs (often known as Heirs or Herald of the Abyss, depending on version)
Path: Destruction (Damage-dealing, burst-focused)
Element: Quantum
Role: Main DPS / Burst Damage Dealer
Team Role: High burst, strong single-target damage, excels against bosses and elite enemies.


Note: This guide assumes you're using the 5-star Quantum DPS character with the signature CD > ER > ATK% > Speed (only if needed for turn order) ❌ Avoid: HP%, DEF%, Healing Bonus (unless for a niche support role) 2. Artifact Sets (Recommended) ✅ Best Set (High Burst DPS) 2pc: "The Wasted Heir" (Quantum) 4pc: "The Wasted Heir" (Quantum) Effect: After using an Elemental Burst, gain 30% ATK% and 30% SPD for 1 turn. This stacks up to 2 times. 💡 Why it’s great: Massive burst boost, perfect for a Quantum DPS. The 30% ATK% and SPD boost dramatically increases damage on burst turn. ⚠️ Note: Requires 2-stack management (use burst, then use another ability to refresh the buff). You’ll want to use burst, then normal attack to maintain uptime. 🔁 Alternative (if "The Wasted Heir" not available) 2pc: "Searing Moon" (Quantum) 2pc: "Stalwart and Sojourner" (Quantum) 4pc: "Searing Moon" (Quantum) Effect: After breaking an enemy, gains 20% ATK% and 20% EM (Energy Multiplier) for 2 turns. 💡 Best for: Enemies with high defense or shields, especially in Abyss floors or hard mode. 🔥 High-Efficiency Set (if you need more CDR/ER) 4pc: "The Wasted Heir" (Quantum) 4pc: "The Wasted Heir" (Quantum) + 2pc: "Searing Moon" (if you're struggling with CDR/ER) ✅ Use 2pc: "The Wasted Heir" + 2pc: "Searing Moon" only if you're maxing CDR and want extra EM for Weakness Break. 🛡️ Auras (Emblems) – Aura Selection Note: Auras (Emblems) are passive traits that enhance stats based on character level, rank, and talent level. ✅ Best Aura (Maximize Burst Damage) Emblem: "The Wasted Heir" (Quantum) Effect: After using an Elemental Burst, gain +30% ATK% and +30% SPD for 1 turn. Why: Directly increases damage output on burst turn. ✅ Best for: Single-target burst, boss fights, and hard-mode Abyss. 🔁 Alternative Auras Emblem: "The Wasted Heir" (Quantum) + 2pc: "Searing Moon" (if you want EM boost on Break) Emblem: "Searing Moon" (Quantum) Effect: After breaking an enemy, gain +20% ATK% and +20% EM for 2 turns. ⚠️ Use this only if you're fighting enemies with high defense or shields. 🧩 Talent Priorities Ultimate (Burst): Max as #1 priority (most damage output). Normal Attack: Max to maintain energy and for sub-ability usage. Skill: Max only if it provides useful utility (e.g., energy regeneration, shield, or status effect). Evasion/Defensive Skills: Usually not prioritized unless you’re in a very hard mode or need survivability. ✅ Golden Rule: Burst > Normal Attack > Skill 🎮 Team Synergy Tips Support Pairing: Use a Quantum Break DPS (e.g., Acheron, Yanqing) to trigger Weakness Breaks. Pair with a Debuff/DoT support (e.g., Herta, Pela, Fu Hua) to extend burst uptime. Include a CDR or ER support (e.g., Machina, Setaria) to enable faster bursts. Energy Management: Use characters like Sampo (if available) or Luka to regenerate energy fast. Perfect Turn Order: Place Heirs after your energy regenerator or support, so they can burst immediately. 📊 Final Build Summary Stat Target Notes Main Stat ATK% (if using 4pc The Wasted Heir) Otherwise CR or CD Sub-Stats CR > CD > ER > ATK% > SPD Prioritize CR/CD balance Artifacts 4pc "The Wasted Heir" (Quantum) Best for burst damage Emblems "The Wasted Heir" (Quantum) Boosts burst damage Talents Ultimate > Normal Attack > Skill Max Ultimate first 🏁 Final Thoughts Abyss's Chosen Heirs shines in high-damage burst fights, especially against bosses, elite enemies, and Abyss floors. "The Wasted Heir" set + 4pc emblem is unmatched for Quantum DPS in 5-star tier. Prioritize CR/CD balance, ER for energy sustainability, and team synergy. ✨ Pro Tip: Use "Quantum" or "Break" decks to maximize Weakness Break and burst damage synergy. If you have a specific version of Abyss's Chosen Heirs (e.g., Acheron, Yanqing, or another name), let me know and I’ll tailor the guide exactly to that character. Stay strong, Trailblazer. The Abyss awaits. 🌑⚔️" onerror="this.onerror='';this.src='/assets/images/morentu/200-200.png'" uk-cover>