bimmer-tool Lite

bimmer-tool Lite

Autos y vehículos
  • Plataforma:Android
  • Versión:3.7.6
  • Tamaño:10.5 MB
  • Desarrollador:bimmer-tool
4.0
Descripción

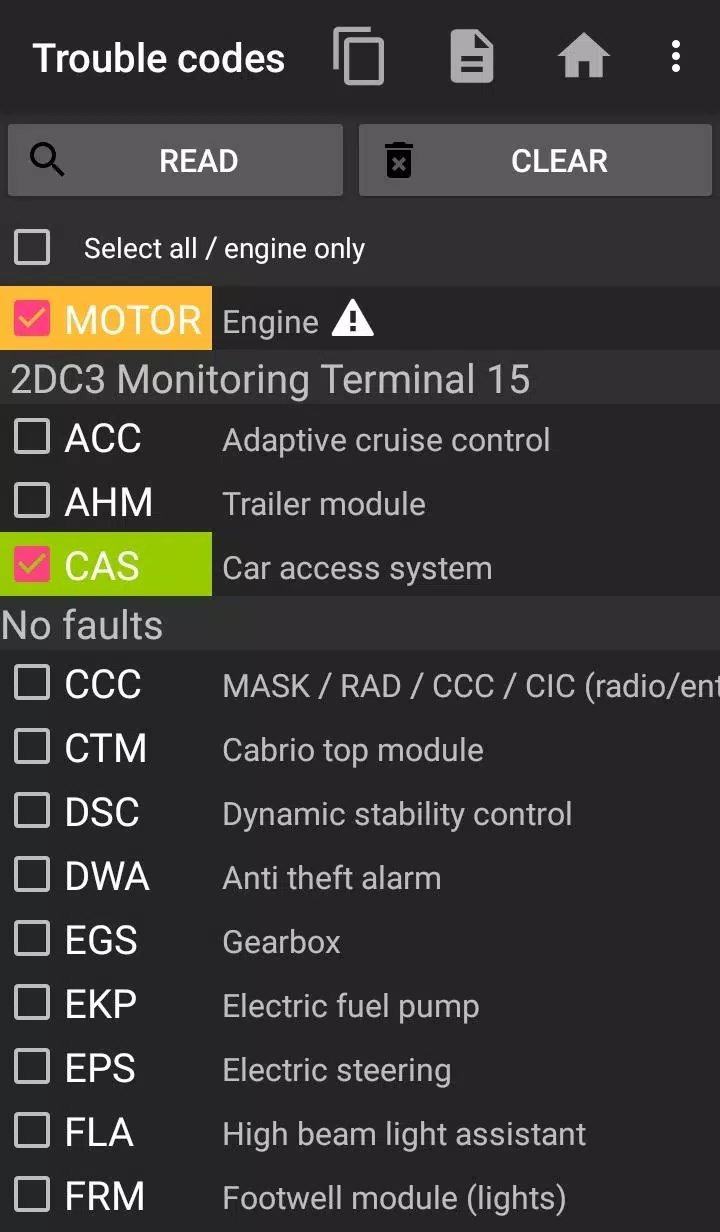
Bimmer-Tool: el compañero de diagnóstico de su BMW

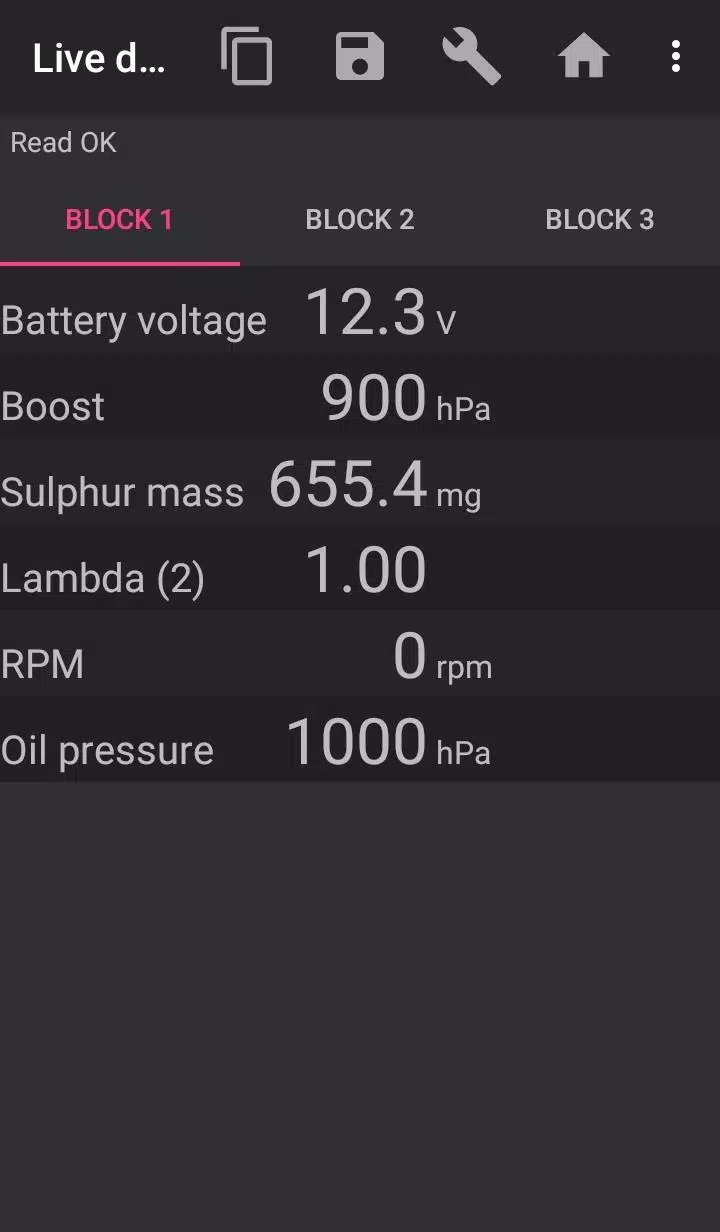
Bimmer-Tool proporciona capacidades de diagnóstico integrales para los vehículos BMW, incluida la lectura y compensación del código de fallas, el inicio de regeneración de DPF y el monitoreo de datos de motores en vivo. La funcionalidad varía según el año modelo del vehículo y el adaptador OBD utilizado.

Notas de compatibilidad:

Para los BMW anteriores a 2008, la funcionalidad es limitada y se recomienda un cable USB K+DCAN. La compatibilidad del adaptador ELM inalámbrico puede ser inconsistente o incompleta.

Esencial: un adaptador OBD confiable

Esta aplicación requiere un adaptador OBD confiable. Se sugieren los siguientes:

  • Cable K+DCAN: Muy recomendable, ofreciendo una confiabilidad superior. También se necesita un cable USB-OTG.
  • Adaptador ENET (serie F/G): Recomendado para la serie F y G BMWS. Requiere un adaptador USB-C a Ethernet.
  • VGATE VLINKER MC/FS/BM/FD: - Unicarscan UCSI-2000/USCI-2100: Establecer en modo D-CAN: MODE2.
  • Carista:
  • Veepeak obdcheck ble:

Características clave:

  • Estado de regeneración de DPF e información detallada
  • Iniciación de regeneración DPF
  • Restablecimiento del valor de adaptación DPF (reemplazo posterior al filtro)
  • Lecturas de retrocesión de escape
  • Datos de ajuste del inyector
  • Masa de aire, presión del colector de admisión y presión de combustible (valores reales y esperados)
  • Registro de datos a archivos CSV
  • Registro de reemplazo de la batería (sin alterar las propiedades de la batería)
  • Circuitos de la lámpara de restablecimiento bloqueados por errores de cortocircuito
  • Servicio de aceite/freno e restablecimiento de intervalo **

Adaptadores OBD compatibles:

  • K+D-Can USB (recomendado)
  • Adaptador ENET Cable/Wifi (recomendado para la serie F&G)
  • Bluetooth ELM327 (puede ser más lento; adaptadores genuinos ELM327 o basados ​​en PIC18 solo; puede no funcionar con motores más antiguos)
  • Elm327 wifi (puede ser menos estable; los datos móviles pueden necesitar deshabilitar)

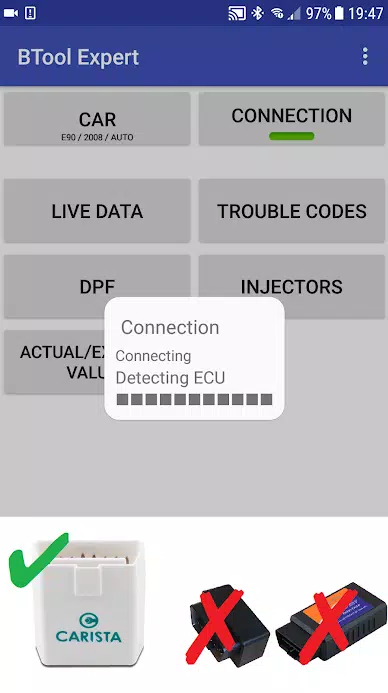
Guía de inicio rápido:

  1. Conecte el adaptador al puerto OBD II.
  2. Enciende el encendido.
  3. Conecte el adaptador a su teléfono (USB, Bluetooth o WiFi, según corresponda).
  4. Inicie la aplicación, seleccione el modelo y el año de su automóvil.
  5. Elija su tipo de conexión, tipo de adaptador y protocolo de comunicación.
  6. Toque "Conectar".

Limitaciones:

Los modelos anteriores a 2008 (E46/E39/E83/E53) requieren un cable K+DCAN; Solo la ECU del motor es compatible. La conexión del adaptador ELM inalámbrico puede fallar.

Solución de problemas:

  • Error de "sin respuesta" (anterior a 2007, BT/WiFi): Intente seleccionar la opción "ATWM" en la configuración de conexión avanzada.
  • Sin conexión: Asegúrese de configuración correcta del adaptador y protocolo. Aplicaciones de diagnóstico de parada de fuerza (incluida la herramienta de bimmer) o reinicie su teléfono.

Permisos:

Almacenamiento, fotos/medios/archivos (creación de CSV), acceso a Bluetooth, acceso a la red, ubicación aproximada (no se usa realmente).

Versión 3.7.6-L (10 de noviembre de 2024)

  • Ajuste de velocidad de ralentí diesel
  • Control del cuerpo del acelerador

Etiquetas : Auto y vehículos

bimmer-tool Lite capturas de pantalla
  • bimmer-tool Lite Captura de pantalla 0
  • bimmer-tool Lite Captura de pantalla 1
  • bimmer-tool Lite Captura de pantalla 2
Últimos artículos
CD > ER > ATK% > Speed (only if needed for turn order) ❌ Avoid: HP%, DEF%, Healing Bonus (unless for a niche support role) 2. Artifact Sets (Recommended) ✅ Best Set (High Burst DPS) 2pc: "The Wasted Heir" (Quantum) 4pc: "The Wasted Heir" (Quantum) Effect: After using an Elemental Burst, gain 30% ATK% and 30% SPD for 1 turn. This stacks up to 2 times. 💡 Why it’s great: Massive burst boost, perfect for a Quantum DPS. The 30% ATK% and SPD boost dramatically increases damage on burst turn. ⚠️ Note: Requires 2-stack management (use burst, then use another ability to refresh the buff). You’ll want to use burst, then normal attack to maintain uptime. 🔁 Alternative (if "The Wasted Heir" not available) 2pc: "Searing Moon" (Quantum) 2pc: "Stalwart and Sojourner" (Quantum) 4pc: "Searing Moon" (Quantum) Effect: After breaking an enemy, gains 20% ATK% and 20% EM (Energy Multiplier) for 2 turns. 💡 Best for: Enemies with high defense or shields, especially in Abyss floors or hard mode. 🔥 High-Efficiency Set (if you need more CDR/ER) 4pc: "The Wasted Heir" (Quantum) 4pc: "The Wasted Heir" (Quantum) + 2pc: "Searing Moon" (if you're struggling with CDR/ER) ✅ Use 2pc: "The Wasted Heir" + 2pc: "Searing Moon" only if you're maxing CDR and want extra EM for Weakness Break. 🛡️ Auras (Emblems) – Aura Selection Note: Auras (Emblems) are passive traits that enhance stats based on character level, rank, and talent level. ✅ Best Aura (Maximize Burst Damage) Emblem: "The Wasted Heir" (Quantum) Effect: After using an Elemental Burst, gain +30% ATK% and +30% SPD for 1 turn. Why: Directly increases damage output on burst turn. ✅ Best for: Single-target burst, boss fights, and hard-mode Abyss. 🔁 Alternative Auras Emblem: "The Wasted Heir" (Quantum) + 2pc: "Searing Moon" (if you want EM boost on Break) Emblem: "Searing Moon" (Quantum) Effect: After breaking an enemy, gain +20% ATK% and +20% EM for 2 turns. ⚠️ Use this only if you're fighting enemies with high defense or shields. 🧩 Talent Priorities Ultimate (Burst): Max as #1 priority (most damage output). Normal Attack: Max to maintain energy and for sub-ability usage. Skill: Max only if it provides useful utility (e.g., energy regeneration, shield, or status effect). Evasion/Defensive Skills: Usually not prioritized unless you’re in a very hard mode or need survivability. ✅ Golden Rule: Burst > Normal Attack > Skill 🎮 Team Synergy Tips Support Pairing: Use a Quantum Break DPS (e.g., Acheron, Yanqing) to trigger Weakness Breaks. Pair with a Debuff/DoT support (e.g., Herta, Pela, Fu Hua) to extend burst uptime. Include a CDR or ER support (e.g., Machina, Setaria) to enable faster bursts. Energy Management: Use characters like Sampo (if available) or Luka to regenerate energy fast. Perfect Turn Order: Place Heirs after your energy regenerator or support, so they can burst immediately. 📊 Final Build Summary Stat Target Notes Main Stat ATK% (if using 4pc The Wasted Heir) Otherwise CR or CD Sub-Stats CR > CD > ER > ATK% > SPD Prioritize CR/CD balance Artifacts 4pc "The Wasted Heir" (Quantum) Best for burst damage Emblems "The Wasted Heir" (Quantum) Boosts burst damage Talents Ultimate > Normal Attack > Skill Max Ultimate first 🏁 Final Thoughts Abyss's Chosen Heirs shines in high-damage burst fights, especially against bosses, elite enemies, and Abyss floors. "The Wasted Heir" set + 4pc emblem is unmatched for Quantum DPS in 5-star tier. Prioritize CR/CD balance, ER for energy sustainability, and team synergy. ✨ Pro Tip: Use "Quantum" or "Break" decks to maximize Weakness Break and burst damage synergy. If you have a specific version of Abyss's Chosen Heirs (e.g., Acheron, Yanqing, or another name), let me know and I’ll tailor the guide exactly to that character. Stay strong, Trailblazer. The Abyss awaits. 🌑⚔️" > Certainly! Here's a comprehensive Stat and Aura Guide for Abyss's Chosen Heirs in Honkai: Star Rail, focusing on optimal builds, stat priorities, and aura (Emblem) selection to maximize damage, survivability, and team synergy.

🌑 Abyss's Chosen Heirs – Overview

Character: Abyss's Chosen Heirs (often known as Heirs or Herald of the Abyss, depending on version)
Path: Destruction (Damage-dealing, burst-focused)
Element: Quantum
Role: Main DPS / Burst Damage Dealer
Team Role: High burst, strong single-target damage, excels against bosses and elite enemies.


Note: This guide assumes you're using the 5-star Quantum DPS character with the signature CD > ER > ATK% > Speed (only if needed for turn order) ❌ Avoid: HP%, DEF%, Healing Bonus (unless for a niche support role) 2. Artifact Sets (Recommended) ✅ Best Set (High Burst DPS) 2pc: "The Wasted Heir" (Quantum) 4pc: "The Wasted Heir" (Quantum) Effect: After using an Elemental Burst, gain 30% ATK% and 30% SPD for 1 turn. This stacks up to 2 times. 💡 Why it’s great: Massive burst boost, perfect for a Quantum DPS. The 30% ATK% and SPD boost dramatically increases damage on burst turn. ⚠️ Note: Requires 2-stack management (use burst, then use another ability to refresh the buff). You’ll want to use burst, then normal attack to maintain uptime. 🔁 Alternative (if "The Wasted Heir" not available) 2pc: "Searing Moon" (Quantum) 2pc: "Stalwart and Sojourner" (Quantum) 4pc: "Searing Moon" (Quantum) Effect: After breaking an enemy, gains 20% ATK% and 20% EM (Energy Multiplier) for 2 turns. 💡 Best for: Enemies with high defense or shields, especially in Abyss floors or hard mode. 🔥 High-Efficiency Set (if you need more CDR/ER) 4pc: "The Wasted Heir" (Quantum) 4pc: "The Wasted Heir" (Quantum) + 2pc: "Searing Moon" (if you're struggling with CDR/ER) ✅ Use 2pc: "The Wasted Heir" + 2pc: "Searing Moon" only if you're maxing CDR and want extra EM for Weakness Break. 🛡️ Auras (Emblems) – Aura Selection Note: Auras (Emblems) are passive traits that enhance stats based on character level, rank, and talent level. ✅ Best Aura (Maximize Burst Damage) Emblem: "The Wasted Heir" (Quantum) Effect: After using an Elemental Burst, gain +30% ATK% and +30% SPD for 1 turn. Why: Directly increases damage output on burst turn. ✅ Best for: Single-target burst, boss fights, and hard-mode Abyss. 🔁 Alternative Auras Emblem: "The Wasted Heir" (Quantum) + 2pc: "Searing Moon" (if you want EM boost on Break) Emblem: "Searing Moon" (Quantum) Effect: After breaking an enemy, gain +20% ATK% and +20% EM for 2 turns. ⚠️ Use this only if you're fighting enemies with high defense or shields. 🧩 Talent Priorities Ultimate (Burst): Max as #1 priority (most damage output). Normal Attack: Max to maintain energy and for sub-ability usage. Skill: Max only if it provides useful utility (e.g., energy regeneration, shield, or status effect). Evasion/Defensive Skills: Usually not prioritized unless you’re in a very hard mode or need survivability. ✅ Golden Rule: Burst > Normal Attack > Skill 🎮 Team Synergy Tips Support Pairing: Use a Quantum Break DPS (e.g., Acheron, Yanqing) to trigger Weakness Breaks. Pair with a Debuff/DoT support (e.g., Herta, Pela, Fu Hua) to extend burst uptime. Include a CDR or ER support (e.g., Machina, Setaria) to enable faster bursts. Energy Management: Use characters like Sampo (if available) or Luka to regenerate energy fast. Perfect Turn Order: Place Heirs after your energy regenerator or support, so they can burst immediately. 📊 Final Build Summary Stat Target Notes Main Stat ATK% (if using 4pc The Wasted Heir) Otherwise CR or CD Sub-Stats CR > CD > ER > ATK% > SPD Prioritize CR/CD balance Artifacts 4pc "The Wasted Heir" (Quantum) Best for burst damage Emblems "The Wasted Heir" (Quantum) Boosts burst damage Talents Ultimate > Normal Attack > Skill Max Ultimate first 🏁 Final Thoughts Abyss's Chosen Heirs shines in high-damage burst fights, especially against bosses, elite enemies, and Abyss floors. "The Wasted Heir" set + 4pc emblem is unmatched for Quantum DPS in 5-star tier. Prioritize CR/CD balance, ER for energy sustainability, and team synergy. ✨ Pro Tip: Use "Quantum" or "Break" decks to maximize Weakness Break and burst damage synergy. If you have a specific version of Abyss's Chosen Heirs (e.g., Acheron, Yanqing, or another name), let me know and I’ll tailor the guide exactly to that character. Stay strong, Trailblazer. The Abyss awaits. 🌑⚔️" onerror="this.onerror='';this.src='/assets/images/morentu/200-200.png'" uk-cover>