Hogar Aplicaciones Personalización Mandala Maker 360
Mandala Maker 360

Mandala Maker 360

Personalización
  • Plataforma:Android
  • Versión:23.0
  • Tamaño:12.00M
4.5
Descripción

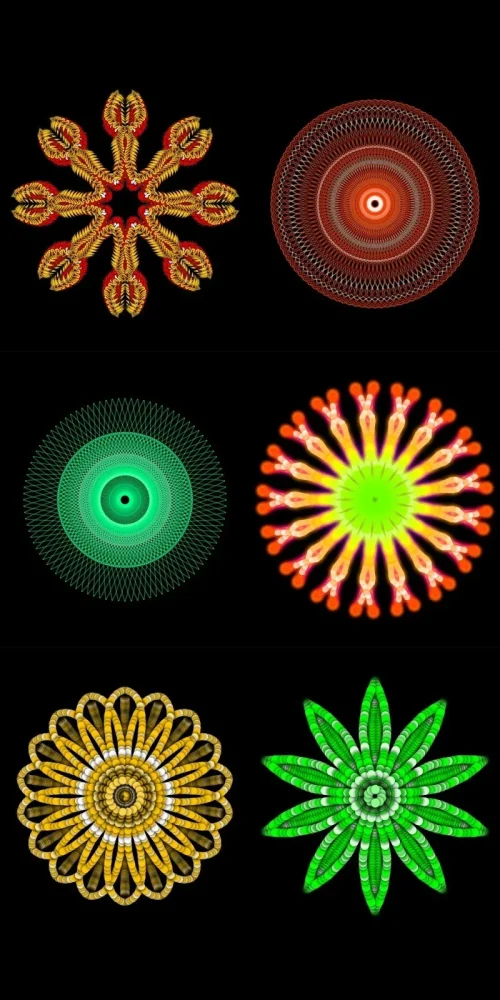
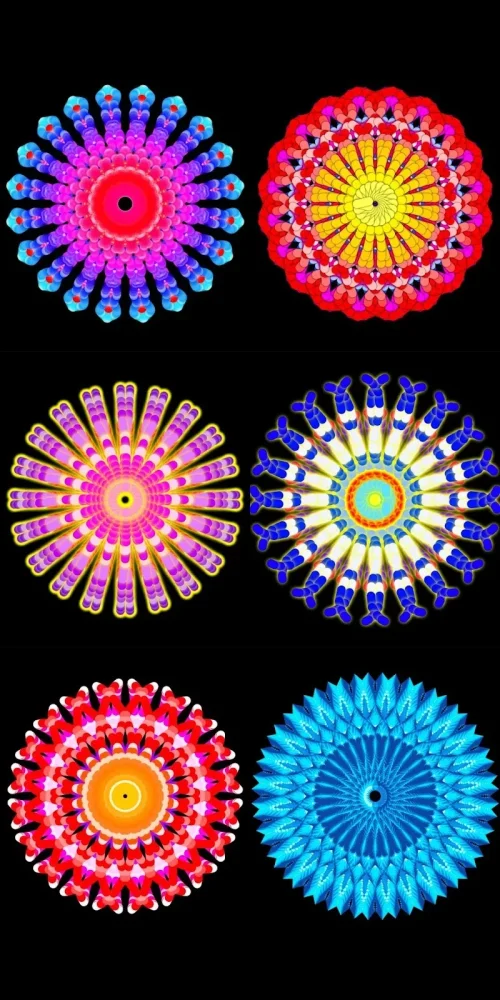
Presentamos Mandala Maker 360, la aplicación que permite a los usuarios crear sin esfuerzo impresionantes e intrincados dibujos de mandalas. Con una gran cantidad de funciones de personalización, puedes ajustar la simetría del lienzo, el color de fondo, la configuración del pincel, agregar sombras y mucho más. Además, hay más de 50 patrones predefinidos para elegir, o puedes usar tus propias imágenes como base para tu mandala. Da rienda suelta a tu creatividad con lienzos personalizables y una amplia gama de opciones de pinceles, incluidos diferentes estilos, colores y tamaños. ¿Necesitas algo de inspiración? Mandala Maker 360 proporciona más de 50 imágenes para dibujar. Y si desea agregar profundidad y dimensión a su obra de arte, simplemente aplique sombras con solo tocar un botón. Para aquellos que buscan un atajo, también hay patrones predefinidos disponibles. Con Mandala Maker 360, tienes todas las herramientas que necesitas para crear mandalas fascinantes. ¡Descárgalo ahora y deja volar tu imaginación!

Características de esta aplicación:

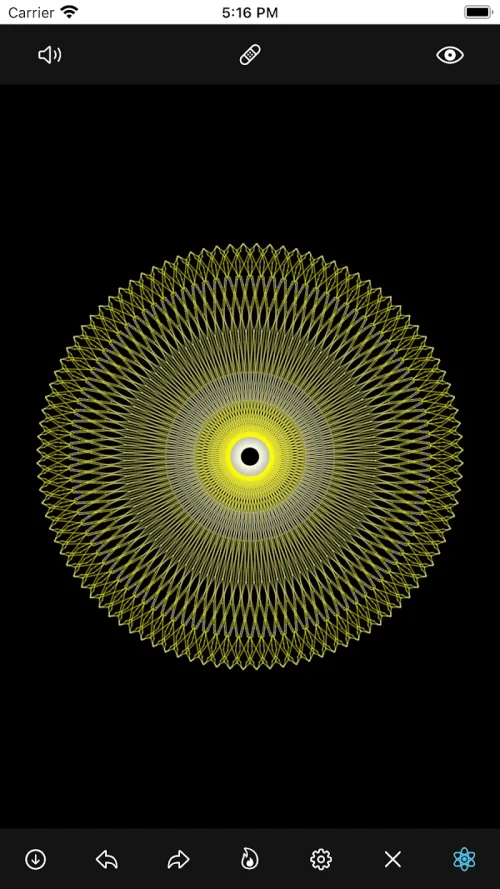
  • Personalización del lienzo: Mandala Maker 360 permite a los usuarios personalizar el lienzo, incluido cambiar el color de fondo, la simetría del lienzo y la ubicación central. Esta función permite a los usuarios dar rienda suelta a su creatividad y hacer que sus mandalas sean realmente únicos.
  • Opciones de pincel: La aplicación proporciona una amplia gama de opciones de personalización de pinceles, incluidos diferentes estilos, colores y tamaños de pincel. y tipos. Los usuarios pueden lograr fácilmente el aspecto deseado para sus mandalas seleccionando las opciones de pincel que se adapten a sus preferencias.
  • Imágenes para inspirarse: Con más de 50 imágenes disponibles, los usuarios pueden elegir entre una variedad de imágenes como flores o animales para usar como base para sus mandalas. Esta función ayuda a generar ideas creativas y brinda inspiración a los usuarios cuando comienzan a dibujar mandalas.
  • Sombras para profundidad: Agregar sombras a los mandalas puede hacer que la obra de arte sea visualmente atractiva y darle más profundidad. Mandala Maker 360 ofrece la opción de aplicar sombras con diferentes tamaños y colores, lo que permite a los usuarios crear mandalas más realistas y fascinantes.
  • Patrones para atajos: En lugar de comenzar con un lienzo en blanco, los usuarios Puede elegir entre patrones predefinidos, como círculos, cuadrados y triángulos, para utilizarlos como base para sus mandalas. Esta característica ahorra tiempo y brinda a los usuarios un impulso para su obra de arte de mandala, que luego pueden desarrollar o mejorar.
  • Inmensa cantidad de opciones de creatividad: Mandala Maker 360 ofrece una amplia gama de funciones de personalización y creación, incluidos controles de lienzo y pincel, imágenes inspiradoras, sombras geniales y patrones. Con esta aplicación, los usuarios tienen acceso a todo lo que necesitan para crear hermosos e intrincados dibujos de mandalas.

En general, Mandala Maker 360 es una aplicación atractiva para cualquiera que busque una manera fácil de crear dibujos de mandalas. Proporciona una gran cantidad de opciones de personalización y creatividad, lo que la convierte en una herramienta versátil tanto para artistas como para aficionados.

Etiquetas : Otro

Mandala Maker 360 capturas de pantalla
  • Mandala Maker 360 Captura de pantalla 0
  • Mandala Maker 360 Captura de pantalla 1
  • Mandala Maker 360 Captura de pantalla 2
  • Mandala Maker 360 Captura de pantalla 3
Últimos artículos
CD > ER > ATK% > Speed (only if needed for turn order) ❌ Avoid: HP%, DEF%, Healing Bonus (unless for a niche support role) 2. Artifact Sets (Recommended) ✅ Best Set (High Burst DPS) 2pc: "The Wasted Heir" (Quantum) 4pc: "The Wasted Heir" (Quantum) Effect: After using an Elemental Burst, gain 30% ATK% and 30% SPD for 1 turn. This stacks up to 2 times. 💡 Why it’s great: Massive burst boost, perfect for a Quantum DPS. The 30% ATK% and SPD boost dramatically increases damage on burst turn. ⚠️ Note: Requires 2-stack management (use burst, then use another ability to refresh the buff). You’ll want to use burst, then normal attack to maintain uptime. 🔁 Alternative (if "The Wasted Heir" not available) 2pc: "Searing Moon" (Quantum) 2pc: "Stalwart and Sojourner" (Quantum) 4pc: "Searing Moon" (Quantum) Effect: After breaking an enemy, gains 20% ATK% and 20% EM (Energy Multiplier) for 2 turns. 💡 Best for: Enemies with high defense or shields, especially in Abyss floors or hard mode. 🔥 High-Efficiency Set (if you need more CDR/ER) 4pc: "The Wasted Heir" (Quantum) 4pc: "The Wasted Heir" (Quantum) + 2pc: "Searing Moon" (if you're struggling with CDR/ER) ✅ Use 2pc: "The Wasted Heir" + 2pc: "Searing Moon" only if you're maxing CDR and want extra EM for Weakness Break. 🛡️ Auras (Emblems) – Aura Selection Note: Auras (Emblems) are passive traits that enhance stats based on character level, rank, and talent level. ✅ Best Aura (Maximize Burst Damage) Emblem: "The Wasted Heir" (Quantum) Effect: After using an Elemental Burst, gain +30% ATK% and +30% SPD for 1 turn. Why: Directly increases damage output on burst turn. ✅ Best for: Single-target burst, boss fights, and hard-mode Abyss. 🔁 Alternative Auras Emblem: "The Wasted Heir" (Quantum) + 2pc: "Searing Moon" (if you want EM boost on Break) Emblem: "Searing Moon" (Quantum) Effect: After breaking an enemy, gain +20% ATK% and +20% EM for 2 turns. ⚠️ Use this only if you're fighting enemies with high defense or shields. 🧩 Talent Priorities Ultimate (Burst): Max as #1 priority (most damage output). Normal Attack: Max to maintain energy and for sub-ability usage. Skill: Max only if it provides useful utility (e.g., energy regeneration, shield, or status effect). Evasion/Defensive Skills: Usually not prioritized unless you’re in a very hard mode or need survivability. ✅ Golden Rule: Burst > Normal Attack > Skill 🎮 Team Synergy Tips Support Pairing: Use a Quantum Break DPS (e.g., Acheron, Yanqing) to trigger Weakness Breaks. Pair with a Debuff/DoT support (e.g., Herta, Pela, Fu Hua) to extend burst uptime. Include a CDR or ER support (e.g., Machina, Setaria) to enable faster bursts. Energy Management: Use characters like Sampo (if available) or Luka to regenerate energy fast. Perfect Turn Order: Place Heirs after your energy regenerator or support, so they can burst immediately. 📊 Final Build Summary Stat Target Notes Main Stat ATK% (if using 4pc The Wasted Heir) Otherwise CR or CD Sub-Stats CR > CD > ER > ATK% > SPD Prioritize CR/CD balance Artifacts 4pc "The Wasted Heir" (Quantum) Best for burst damage Emblems "The Wasted Heir" (Quantum) Boosts burst damage Talents Ultimate > Normal Attack > Skill Max Ultimate first 🏁 Final Thoughts Abyss's Chosen Heirs shines in high-damage burst fights, especially against bosses, elite enemies, and Abyss floors. "The Wasted Heir" set + 4pc emblem is unmatched for Quantum DPS in 5-star tier. Prioritize CR/CD balance, ER for energy sustainability, and team synergy. ✨ Pro Tip: Use "Quantum" or "Break" decks to maximize Weakness Break and burst damage synergy. If you have a specific version of Abyss's Chosen Heirs (e.g., Acheron, Yanqing, or another name), let me know and I’ll tailor the guide exactly to that character. Stay strong, Trailblazer. The Abyss awaits. 🌑⚔️" > Certainly! Here's a comprehensive Stat and Aura Guide for Abyss's Chosen Heirs in Honkai: Star Rail, focusing on optimal builds, stat priorities, and aura (Emblem) selection to maximize damage, survivability, and team synergy.

🌑 Abyss's Chosen Heirs – Overview

Character: Abyss's Chosen Heirs (often known as Heirs or Herald of the Abyss, depending on version)
Path: Destruction (Damage-dealing, burst-focused)
Element: Quantum
Role: Main DPS / Burst Damage Dealer
Team Role: High burst, strong single-target damage, excels against bosses and elite enemies.


Note: This guide assumes you're using the 5-star Quantum DPS character with the signature CD > ER > ATK% > Speed (only if needed for turn order) ❌ Avoid: HP%, DEF%, Healing Bonus (unless for a niche support role) 2. Artifact Sets (Recommended) ✅ Best Set (High Burst DPS) 2pc: "The Wasted Heir" (Quantum) 4pc: "The Wasted Heir" (Quantum) Effect: After using an Elemental Burst, gain 30% ATK% and 30% SPD for 1 turn. This stacks up to 2 times. 💡 Why it’s great: Massive burst boost, perfect for a Quantum DPS. The 30% ATK% and SPD boost dramatically increases damage on burst turn. ⚠️ Note: Requires 2-stack management (use burst, then use another ability to refresh the buff). You’ll want to use burst, then normal attack to maintain uptime. 🔁 Alternative (if "The Wasted Heir" not available) 2pc: "Searing Moon" (Quantum) 2pc: "Stalwart and Sojourner" (Quantum) 4pc: "Searing Moon" (Quantum) Effect: After breaking an enemy, gains 20% ATK% and 20% EM (Energy Multiplier) for 2 turns. 💡 Best for: Enemies with high defense or shields, especially in Abyss floors or hard mode. 🔥 High-Efficiency Set (if you need more CDR/ER) 4pc: "The Wasted Heir" (Quantum) 4pc: "The Wasted Heir" (Quantum) + 2pc: "Searing Moon" (if you're struggling with CDR/ER) ✅ Use 2pc: "The Wasted Heir" + 2pc: "Searing Moon" only if you're maxing CDR and want extra EM for Weakness Break. 🛡️ Auras (Emblems) – Aura Selection Note: Auras (Emblems) are passive traits that enhance stats based on character level, rank, and talent level. ✅ Best Aura (Maximize Burst Damage) Emblem: "The Wasted Heir" (Quantum) Effect: After using an Elemental Burst, gain +30% ATK% and +30% SPD for 1 turn. Why: Directly increases damage output on burst turn. ✅ Best for: Single-target burst, boss fights, and hard-mode Abyss. 🔁 Alternative Auras Emblem: "The Wasted Heir" (Quantum) + 2pc: "Searing Moon" (if you want EM boost on Break) Emblem: "Searing Moon" (Quantum) Effect: After breaking an enemy, gain +20% ATK% and +20% EM for 2 turns. ⚠️ Use this only if you're fighting enemies with high defense or shields. 🧩 Talent Priorities Ultimate (Burst): Max as #1 priority (most damage output). Normal Attack: Max to maintain energy and for sub-ability usage. Skill: Max only if it provides useful utility (e.g., energy regeneration, shield, or status effect). Evasion/Defensive Skills: Usually not prioritized unless you’re in a very hard mode or need survivability. ✅ Golden Rule: Burst > Normal Attack > Skill 🎮 Team Synergy Tips Support Pairing: Use a Quantum Break DPS (e.g., Acheron, Yanqing) to trigger Weakness Breaks. Pair with a Debuff/DoT support (e.g., Herta, Pela, Fu Hua) to extend burst uptime. Include a CDR or ER support (e.g., Machina, Setaria) to enable faster bursts. Energy Management: Use characters like Sampo (if available) or Luka to regenerate energy fast. Perfect Turn Order: Place Heirs after your energy regenerator or support, so they can burst immediately. 📊 Final Build Summary Stat Target Notes Main Stat ATK% (if using 4pc The Wasted Heir) Otherwise CR or CD Sub-Stats CR > CD > ER > ATK% > SPD Prioritize CR/CD balance Artifacts 4pc "The Wasted Heir" (Quantum) Best for burst damage Emblems "The Wasted Heir" (Quantum) Boosts burst damage Talents Ultimate > Normal Attack > Skill Max Ultimate first 🏁 Final Thoughts Abyss's Chosen Heirs shines in high-damage burst fights, especially against bosses, elite enemies, and Abyss floors. "The Wasted Heir" set + 4pc emblem is unmatched for Quantum DPS in 5-star tier. Prioritize CR/CD balance, ER for energy sustainability, and team synergy. ✨ Pro Tip: Use "Quantum" or "Break" decks to maximize Weakness Break and burst damage synergy. If you have a specific version of Abyss's Chosen Heirs (e.g., Acheron, Yanqing, or another name), let me know and I’ll tailor the guide exactly to that character. Stay strong, Trailblazer. The Abyss awaits. 🌑⚔️" onerror="this.onerror='';this.src='/assets/images/morentu/200-200.png'" uk-cover>