Hogar Aplicaciones Autos y vehículos PPPark! -駐車場料金 最安検索-
PPPark! -駐車場料金 最安検索-

PPPark! -駐車場料金 最安検索-

Autos y vehículos
  • Plataforma:Android
  • Versión:1.2.9
  • Tamaño:18.4 MB
  • Desarrollador:interes, Inc.
5.0
Descripción

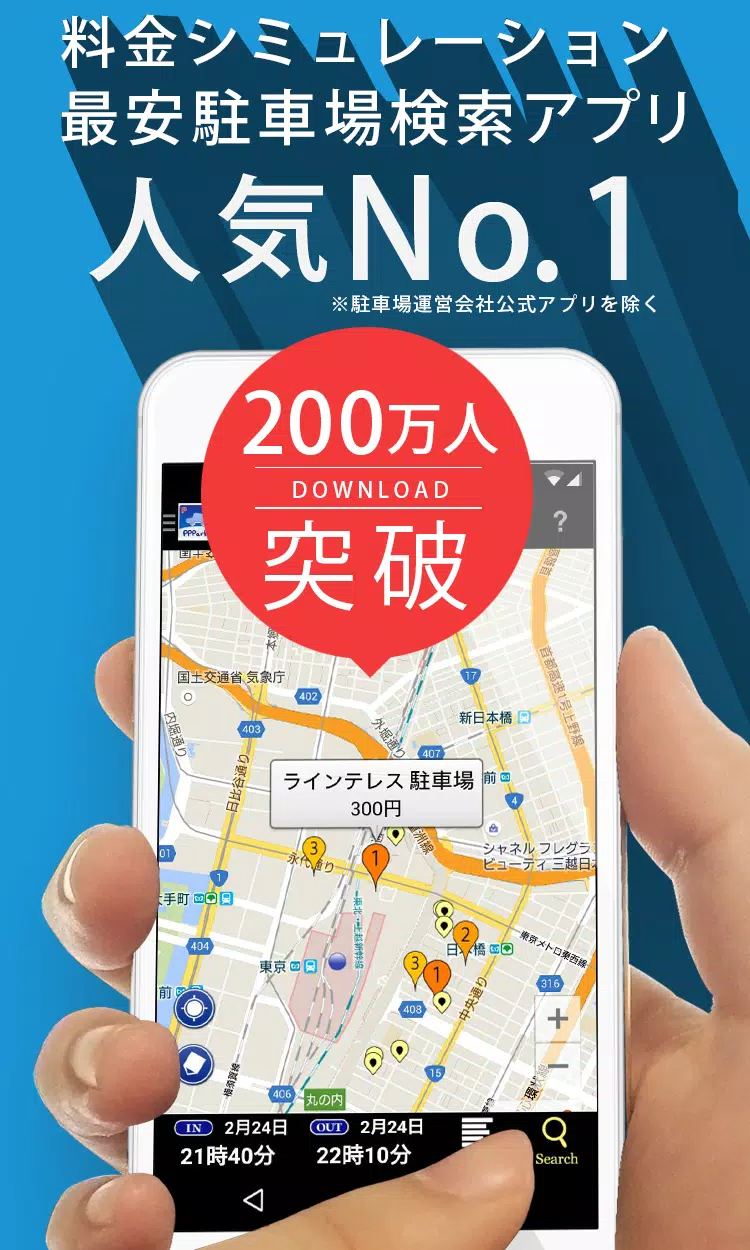
¡Encuentra el estacionamiento mejor medido cerca de ti con nuestra aplicación! Busque rápidamente y compare los precios para evitar pagar en exceso.

Para los usuarios que experimentan problemas en Android 11:

Algunos usuarios de Android 11 han informado que la aplicación se bloquea en el lanzamiento. Para resolver esto, intente borrar el almacenamiento de la aplicación. Nota: Esto borrará su historial de estacionamiento, que no se puede recuperar.

Procedimiento:

  1. Abra "Configuración"
  2. Abra "aplicaciones y notificaciones"
  3. Toque "¡PP Park!"
  4. Abra "Almacenamiento y caché"
  5. Toque "Borrar almacenamiento"

Este problema proviene de Android 11; Google es consciente del problema. Mientras se anticipa una solución, los problemas similares persisten a nivel mundial. Pedimos disculpas por cualquier inconveniente. El almacenamiento de la limpieza es la solución actual.

¡PPPARK!

¡PPPARK! Le ayuda a encontrar el estacionamiento de monedas más barato cerca de su destino. ¡No las preocupaciones de estacionamiento más caras!

¡PPPARK! Características

  • Cálculo automático de precios: ingrese sus horarios de estacionamiento (por ejemplo, "Hoy, de 2 pm a 7 pm"), y la aplicación calcula y muestra precios en orden ascendente.
  • Soporte de carga máxima: encuentre estacionamiento que refleje las tarifas máximas diarias para los precios más precisos.
  • Navegación fácil: integrarse con Google Maps, Yahoo! Mapas y Navicon para una navegación perfecta a su lugar de estacionamiento elegido.
  • Reserva y estacionamiento compartido: incluye Akippa, especial P (Toku P) y estacionamiento de Tohogas (Okazaki City solamente).
  • Soporte de estacionamiento de la calle: Explays Street Parking (limitado por el tiempo) en Tokio, Kanagawa y Osaka. Indicado por líneas/círculos verdes claros en el mapa. *Recuerde, exceder el límite de tiempo resulta en una violación de estacionamiento.*

*Descargo de responsabilidad: la información de estacionamiento (precios, horas, ubicación) puede no siempre ser perfectamente precisa. Verifique siempre los detalles en el sitio.*

  • Estacionamiento tratado con el usuario: agregue o actualice la información de estacionamiento.

*Nota: las versiones de Android 10 y posteriores no retienen la información publicada por el usuario después de los cambios del modelo.*
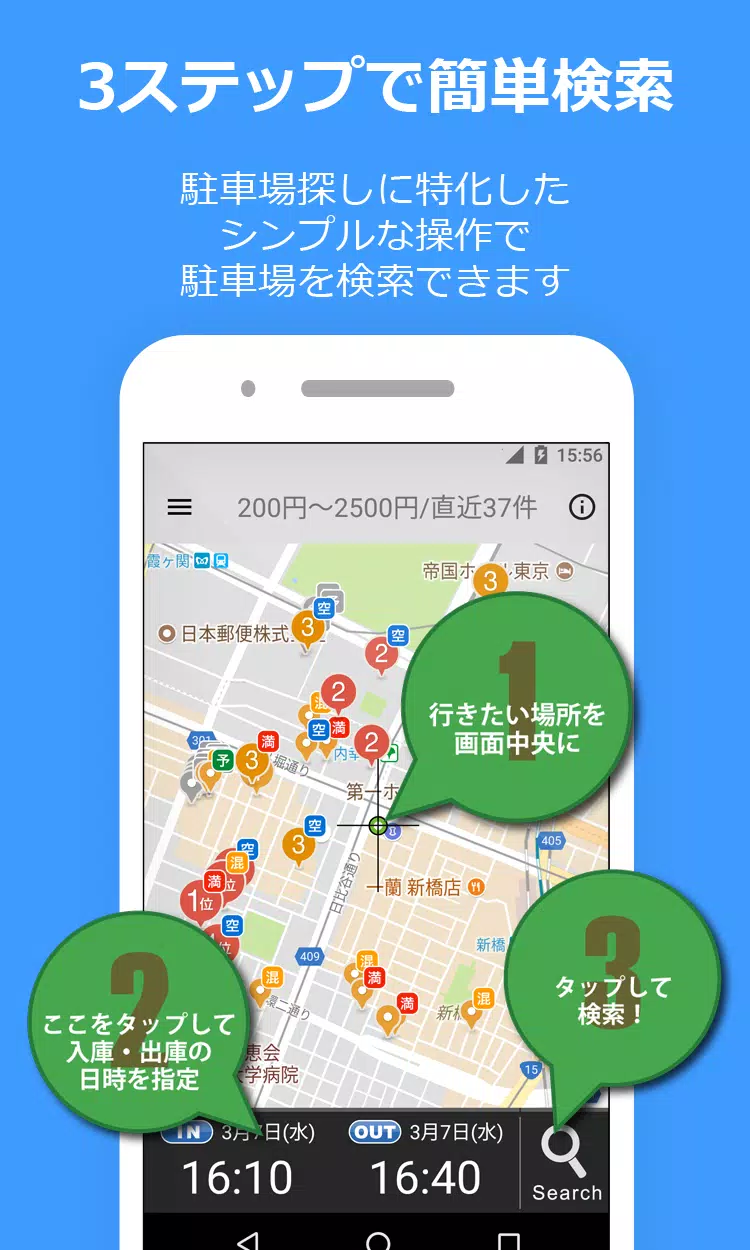
¡Cómo usar ppark!

  1. Localice su destino en el mapa.
  2. Establezca sus tiempos de llegada y salida.
  3. Toque la lupa (abajo a la derecha) para buscar.
  4. Los resultados se muestran en el mapa, ordenado por precio, lo que facilita la búsqueda de la opción más cercana y más barata.

Notas importantes:

  • Requiere "Servicios de desarrollador de Google Play" (Android 4.0+).
  • Los permisos (Wi-Fi, Bluetooth) se utilizan para servicios de ubicación precisos.
  • Siempre verifique los precios en el estacionamiento.
  • Si bien nos esforzamos por la precisión, no podemos garantizar que toda la información de estacionamiento esté actualizada.

Información de estacionamiento

Siempre verifique los precios en el estacionamiento. Si bien actualizamos constantemente información, la precisión no puede garantizarse.

Informes de errores

Informe errores a través de:

Al informar problemas, especifique su modelo de dispositivo y la versión iOS (para usuarios de iPhone).

Campo de golf

  • Sitio web: https://pppark.com
  • Twitter: https://twitter.com/pppark1

Etiquetas : Auto y vehículos

PPPark! -駐車場料金 最安検索- capturas de pantalla
  • PPPark! -駐車場料金 最安検索- Captura de pantalla 0
  • PPPark! -駐車場料金 最安検索- Captura de pantalla 1
  • PPPark! -駐車場料金 最安検索- Captura de pantalla 2
  • PPPark! -駐車場料金 最安検索- Captura de pantalla 3
Últimos artículos
CD > ER > ATK% > Speed (only if needed for turn order) ❌ Avoid: HP%, DEF%, Healing Bonus (unless for a niche support role) 2. Artifact Sets (Recommended) ✅ Best Set (High Burst DPS) 2pc: "The Wasted Heir" (Quantum) 4pc: "The Wasted Heir" (Quantum) Effect: After using an Elemental Burst, gain 30% ATK% and 30% SPD for 1 turn. This stacks up to 2 times. 💡 Why it’s great: Massive burst boost, perfect for a Quantum DPS. The 30% ATK% and SPD boost dramatically increases damage on burst turn. ⚠️ Note: Requires 2-stack management (use burst, then use another ability to refresh the buff). You’ll want to use burst, then normal attack to maintain uptime. 🔁 Alternative (if "The Wasted Heir" not available) 2pc: "Searing Moon" (Quantum) 2pc: "Stalwart and Sojourner" (Quantum) 4pc: "Searing Moon" (Quantum) Effect: After breaking an enemy, gains 20% ATK% and 20% EM (Energy Multiplier) for 2 turns. 💡 Best for: Enemies with high defense or shields, especially in Abyss floors or hard mode. 🔥 High-Efficiency Set (if you need more CDR/ER) 4pc: "The Wasted Heir" (Quantum) 4pc: "The Wasted Heir" (Quantum) + 2pc: "Searing Moon" (if you're struggling with CDR/ER) ✅ Use 2pc: "The Wasted Heir" + 2pc: "Searing Moon" only if you're maxing CDR and want extra EM for Weakness Break. 🛡️ Auras (Emblems) – Aura Selection Note: Auras (Emblems) are passive traits that enhance stats based on character level, rank, and talent level. ✅ Best Aura (Maximize Burst Damage) Emblem: "The Wasted Heir" (Quantum) Effect: After using an Elemental Burst, gain +30% ATK% and +30% SPD for 1 turn. Why: Directly increases damage output on burst turn. ✅ Best for: Single-target burst, boss fights, and hard-mode Abyss. 🔁 Alternative Auras Emblem: "The Wasted Heir" (Quantum) + 2pc: "Searing Moon" (if you want EM boost on Break) Emblem: "Searing Moon" (Quantum) Effect: After breaking an enemy, gain +20% ATK% and +20% EM for 2 turns. ⚠️ Use this only if you're fighting enemies with high defense or shields. 🧩 Talent Priorities Ultimate (Burst): Max as #1 priority (most damage output). Normal Attack: Max to maintain energy and for sub-ability usage. Skill: Max only if it provides useful utility (e.g., energy regeneration, shield, or status effect). Evasion/Defensive Skills: Usually not prioritized unless you’re in a very hard mode or need survivability. ✅ Golden Rule: Burst > Normal Attack > Skill 🎮 Team Synergy Tips Support Pairing: Use a Quantum Break DPS (e.g., Acheron, Yanqing) to trigger Weakness Breaks. Pair with a Debuff/DoT support (e.g., Herta, Pela, Fu Hua) to extend burst uptime. Include a CDR or ER support (e.g., Machina, Setaria) to enable faster bursts. Energy Management: Use characters like Sampo (if available) or Luka to regenerate energy fast. Perfect Turn Order: Place Heirs after your energy regenerator or support, so they can burst immediately. 📊 Final Build Summary Stat Target Notes Main Stat ATK% (if using 4pc The Wasted Heir) Otherwise CR or CD Sub-Stats CR > CD > ER > ATK% > SPD Prioritize CR/CD balance Artifacts 4pc "The Wasted Heir" (Quantum) Best for burst damage Emblems "The Wasted Heir" (Quantum) Boosts burst damage Talents Ultimate > Normal Attack > Skill Max Ultimate first 🏁 Final Thoughts Abyss's Chosen Heirs shines in high-damage burst fights, especially against bosses, elite enemies, and Abyss floors. "The Wasted Heir" set + 4pc emblem is unmatched for Quantum DPS in 5-star tier. Prioritize CR/CD balance, ER for energy sustainability, and team synergy. ✨ Pro Tip: Use "Quantum" or "Break" decks to maximize Weakness Break and burst damage synergy. If you have a specific version of Abyss's Chosen Heirs (e.g., Acheron, Yanqing, or another name), let me know and I’ll tailor the guide exactly to that character. Stay strong, Trailblazer. The Abyss awaits. 🌑⚔️" > Certainly! Here's a comprehensive Stat and Aura Guide for Abyss's Chosen Heirs in Honkai: Star Rail, focusing on optimal builds, stat priorities, and aura (Emblem) selection to maximize damage, survivability, and team synergy.

🌑 Abyss's Chosen Heirs – Overview

Character: Abyss's Chosen Heirs (often known as Heirs or Herald of the Abyss, depending on version)
Path: Destruction (Damage-dealing, burst-focused)
Element: Quantum
Role: Main DPS / Burst Damage Dealer
Team Role: High burst, strong single-target damage, excels against bosses and elite enemies.


Note: This guide assumes you're using the 5-star Quantum DPS character with the signature CD > ER > ATK% > Speed (only if needed for turn order) ❌ Avoid: HP%, DEF%, Healing Bonus (unless for a niche support role) 2. Artifact Sets (Recommended) ✅ Best Set (High Burst DPS) 2pc: "The Wasted Heir" (Quantum) 4pc: "The Wasted Heir" (Quantum) Effect: After using an Elemental Burst, gain 30% ATK% and 30% SPD for 1 turn. This stacks up to 2 times. 💡 Why it’s great: Massive burst boost, perfect for a Quantum DPS. The 30% ATK% and SPD boost dramatically increases damage on burst turn. ⚠️ Note: Requires 2-stack management (use burst, then use another ability to refresh the buff). You’ll want to use burst, then normal attack to maintain uptime. 🔁 Alternative (if "The Wasted Heir" not available) 2pc: "Searing Moon" (Quantum) 2pc: "Stalwart and Sojourner" (Quantum) 4pc: "Searing Moon" (Quantum) Effect: After breaking an enemy, gains 20% ATK% and 20% EM (Energy Multiplier) for 2 turns. 💡 Best for: Enemies with high defense or shields, especially in Abyss floors or hard mode. 🔥 High-Efficiency Set (if you need more CDR/ER) 4pc: "The Wasted Heir" (Quantum) 4pc: "The Wasted Heir" (Quantum) + 2pc: "Searing Moon" (if you're struggling with CDR/ER) ✅ Use 2pc: "The Wasted Heir" + 2pc: "Searing Moon" only if you're maxing CDR and want extra EM for Weakness Break. 🛡️ Auras (Emblems) – Aura Selection Note: Auras (Emblems) are passive traits that enhance stats based on character level, rank, and talent level. ✅ Best Aura (Maximize Burst Damage) Emblem: "The Wasted Heir" (Quantum) Effect: After using an Elemental Burst, gain +30% ATK% and +30% SPD for 1 turn. Why: Directly increases damage output on burst turn. ✅ Best for: Single-target burst, boss fights, and hard-mode Abyss. 🔁 Alternative Auras Emblem: "The Wasted Heir" (Quantum) + 2pc: "Searing Moon" (if you want EM boost on Break) Emblem: "Searing Moon" (Quantum) Effect: After breaking an enemy, gain +20% ATK% and +20% EM for 2 turns. ⚠️ Use this only if you're fighting enemies with high defense or shields. 🧩 Talent Priorities Ultimate (Burst): Max as #1 priority (most damage output). Normal Attack: Max to maintain energy and for sub-ability usage. Skill: Max only if it provides useful utility (e.g., energy regeneration, shield, or status effect). Evasion/Defensive Skills: Usually not prioritized unless you’re in a very hard mode or need survivability. ✅ Golden Rule: Burst > Normal Attack > Skill 🎮 Team Synergy Tips Support Pairing: Use a Quantum Break DPS (e.g., Acheron, Yanqing) to trigger Weakness Breaks. Pair with a Debuff/DoT support (e.g., Herta, Pela, Fu Hua) to extend burst uptime. Include a CDR or ER support (e.g., Machina, Setaria) to enable faster bursts. Energy Management: Use characters like Sampo (if available) or Luka to regenerate energy fast. Perfect Turn Order: Place Heirs after your energy regenerator or support, so they can burst immediately. 📊 Final Build Summary Stat Target Notes Main Stat ATK% (if using 4pc The Wasted Heir) Otherwise CR or CD Sub-Stats CR > CD > ER > ATK% > SPD Prioritize CR/CD balance Artifacts 4pc "The Wasted Heir" (Quantum) Best for burst damage Emblems "The Wasted Heir" (Quantum) Boosts burst damage Talents Ultimate > Normal Attack > Skill Max Ultimate first 🏁 Final Thoughts Abyss's Chosen Heirs shines in high-damage burst fights, especially against bosses, elite enemies, and Abyss floors. "The Wasted Heir" set + 4pc emblem is unmatched for Quantum DPS in 5-star tier. Prioritize CR/CD balance, ER for energy sustainability, and team synergy. ✨ Pro Tip: Use "Quantum" or "Break" decks to maximize Weakness Break and burst damage synergy. If you have a specific version of Abyss's Chosen Heirs (e.g., Acheron, Yanqing, or another name), let me know and I’ll tailor the guide exactly to that character. Stay strong, Trailblazer. The Abyss awaits. 🌑⚔️" onerror="this.onerror='';this.src='/assets/images/morentu/200-200.png'" uk-cover>